Do you ever wonder how to easily construct a clipping path in Photoshop?
If that’s the case, here’s the ideal response to your question.
Adobe Photoshop and Illustrator tools convert clipping paths into a closed vector path or an individual object.
This is possible with Adobe InDesign, although it can be difficult to accomplish for a newbie.
So, to make your life easier, we’ll use the Photoshop program.
What is a Clipping Path?
A clipping path is a near vector route that separates a 2D object from its background.
Everything outside the path is deleted after using the procedure. As a result, the chopped section stands alone.
The art, also known as Deep Etch, is created in Photoshop using the pen tool.
This assignment is usually used for eCommerce product photography because of the improved cropping and crispness.
What Is a Clipping Path Used For?
Clipping path, as an important Photoshop task, serves numerous functions for an image, including
- Distinguish an object from the background
- removing an image’s backdrop
- modifying any aspect of an image
- Changing the background color
- removing extraneous things from an image
- Product prioritization in e-commerce product photography
- Use any specific object on a distinct background
How to Create a Photoshop Clipping Path Step By Step Guide
Though building a clipping path is simple, it does require some effort to do it right.
The more practice you put in, the more exact your clipping path will be. So, let’s go over how to make a clipping path in Photoshop –
Step 01: Open The File
Run Photoshop on your computer. To open the file, you wish to work with, go to File and select Open…
Step 02: Select the pen tool
Then, navigate to the toolbar menu. A pen icon can be seen just above the Text tool. You have to select the pen tool now.
Step 03: Establish Anchor Points
The primary part is now up to you. You’ll need to zoom in at first to see the edges clearly.
To do so, hold down the Ctrl and + keys on your keyboard at the same time. You may maintain it close to 200%.
Zooming in will allow you to draw the path more precisely. Begin drawing anchor points around the subject now.
To create your first anchor point, simply click anywhere on the edge. Then, one by one, draw till you reach the starting position.
You may need to create numerous curve lines to get it right.
To do so, hit the Alt key on your keyboard and drag the anchor point’s head as needed.
When separating one thing from another, you must be careful with the edges to maintain a natural appearance. Mark as precisely as possible.
Step 04: Insert a path
There are some blank areas inside the main image of this picture. Therefore, we’ll need to make distinct clipping paths for those.
Step 05: Save the path
After finishing the making process, you have to go to the layer panel.
Next, select the path tab. Select Save Path from the Menu in the left-hand corner now. The box will appear.
Set the path name ‘Path-1’
Step 06: Clipping Path
Now select Clipping Path from the same menu.
A box with several options will appear. Flatness is a box that exists.
The clipping path’s flatness measures how near it is to the image’s edge. The image’s smoothness is determined by this.
Img-9
The edge becomes blurrier as the flatness value rises. The edge will be smoother and crisper if the value is lower.
Step 07: Save Your Photo h3
Then, you can save your image.
If you need to make any modifications later, you can utilize this file.
The path will be available for them to use as needed if you send it to someone else as well.
Remember to save the JPG and PSD files as well.
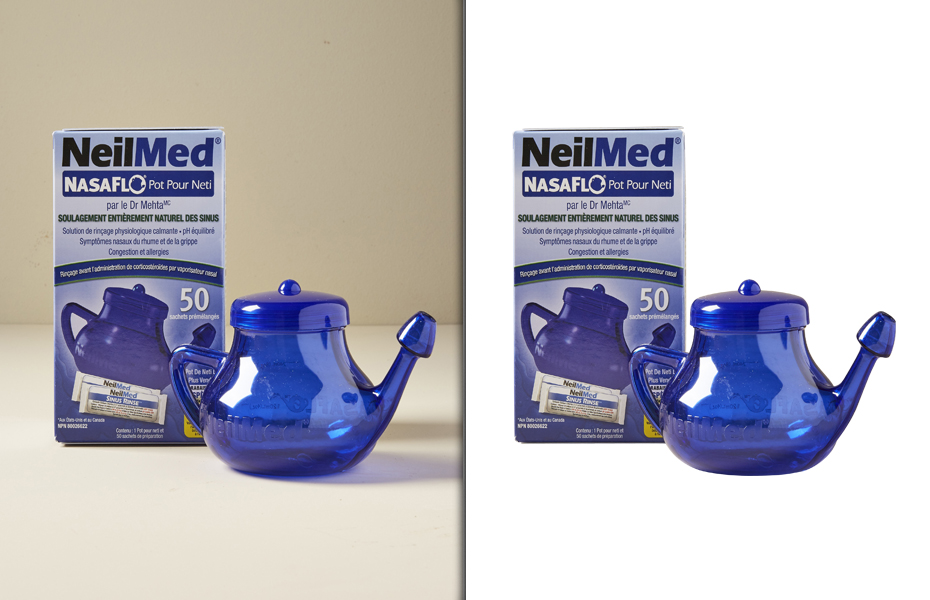
Removing or Adding Background
You can utilize the image at any moment after saving it for any changes you want to make.
You may alter this picture’s background, for instance.
Make that the entire clipping path, including the interior pathways, has been created.
Go to the menu on the toolbar now. There is a path selection tool click immediately beneath the Text icon. Select a path by clicking the icon.
Create a square box enclosing the object now. This will choose each of your created pathways.
Make sure the top menu’s Exclude overlapping forms option is selected.
Now you have to select “Make Selection” by clicking on the right mouse button.
The box will appear. Set the Radius, then select OK.
To add a layer mask, go to the Layer Panel and click the rectangular symbol.
You can remove your backdrop by clicking the button.
Tips for Clipping Path
- For the best accuracy, always use the default pen tool in Photoshop.
- When creating the full path, use the keyboard’s Alt, Ctrl, Shift, and Space buttons.
- Zoom in on the pictures you’ve chosen so you can see the edges clearly.
- Avoid adding extra points because doing so lowers the quality of the path.
- When doing a path, be cautious if the image edges are intricate.
- You may enable the rubber band option in Photoshop’s path options. It will assist you in improving path accuracy.
- If you make a mistake, press Ctrl+Z to discard it, and SHIFT+Ctrl+Z to proceed if you accidentally discard your work.
- If you make a mistake, press Ctrl+Z to discard it, and SHIFT+Ctrl+Z to proceed if you accidentally discard your work.
Final Thought
The link between retailers and customers is created by gorgeous product photos with excellent lighting and color.
Customers won’t agree to purchase goods until the product’s images persuade them to do so.
Although not the primary factor, this is the initial perception.
So, if you’re serious about picture editing, you should learn how to construct a clipping path effectively.